マルグッタ通りの小さな大理石工房
映画「ローマの休日」ファンの間では有名な、ロケ地のひとつ「マルグッタ通り51番地」。緑のツタや植物に覆われた古い建物が並ぶ石畳の通り「Via Marugutta(マルグッタ通り)」は、ローマで最もにぎやかな地区のひとつであるスペイン広場からすぐの場所にあります。
1953年、ローマを舞台に〝王女と新聞記者の24時間の恋物語〟が描かれた映画「ローマの休日」の劇中で、グレゴリー・ペック扮する新聞記者ジョー・ブラッドレーが住んでいたアパートが「Via Marugutta」の51番地。映画の公開から60年以上経った今でも、昔と変わらぬままにその面影を残しています。
多くの著名な芸術家たちからも愛されたこの通りには、かつては「パブロ・ピカソ」や「デ・キリコ」などがアトリエを構え、イタリア映画界の巨匠フェデリコ・フェッリー二監督とその妻ジュリエッタ・マッシーナも緑豊かなこの道を散歩道として愛しました。
そんな穏やかで美しいマルグッタ通りに入ると、とっても素敵な文字で彫られた住所表示などの大理石プレートをあちこちに見かけます。実はこの文字は、マルグッタ通りに職人工房を構える 大理石工房「Il Marmoraro」(イル・マルモラーロ)の サンドロ・フィオレンティーニ職人が彫ったもの。この方は、日本のTV番組でも何度か取り上げられたこともある本当に素晴らしい職人さんです。
![](https://blog.storiaunica.com/wp-content/uploads/2019/02/29852abac1519c4d4c565928f52568e2.jpg)
この「知る人ぞ知る」小さな職人工房では〝オリジナルフレーズ〟を大理石プレートへと彫ってくれるから、実は世界中から観光客が訪れるんだよ。
![](https://blog.storiaunica.com/wp-content/uploads/2019/01/Hal-1.jpg)
石の板に文字を彫ってるだけじゃん...
![](https://blog.storiaunica.com/wp-content/uploads/2019/02/865d52766c08590dec36122957681171.jpg)
いえいえ、単に石に文字を彫っているだけじゃないんです!!!
ひとつひとつ丁寧にハンドメイドで制作しているオリジナルの大理石プレートなんだよ。
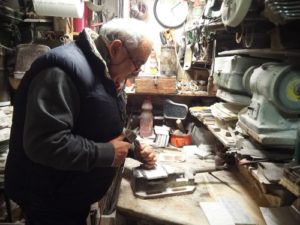
実際に工房の作業を覗いてみよう!
![①](https://blog.storiaunica.com/wp-content/uploads/2016/03/aba1dd9afd994bc383f5259806be7bb4.jpg)
![](https://blog.storiaunica.com/wp-content/uploads/2019/03/d6edfd37c786b6af43c0fd2a5402179f.jpg)
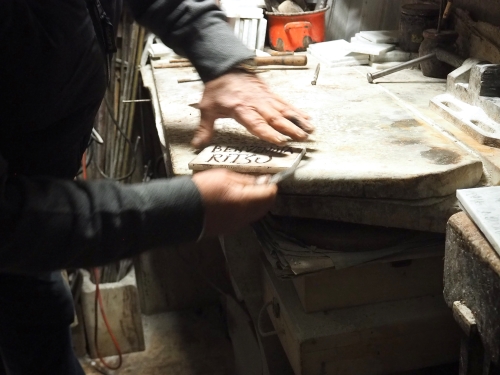
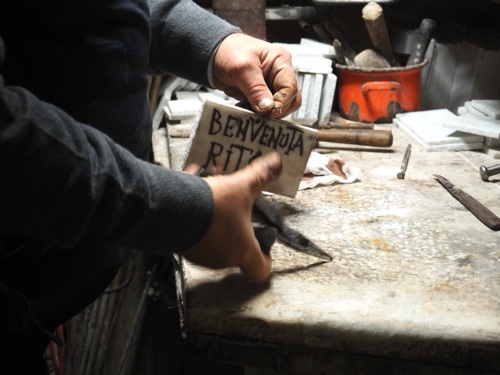
]彫り始める前のプレートには、サンドロ職人が書いた鉛筆の下書き。本当に「それでいいの?!」とビックリするくらいのフリーハンド!!!
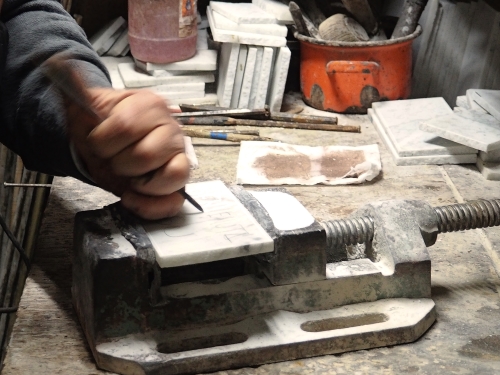
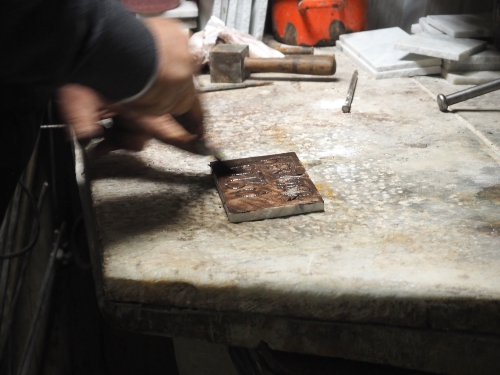
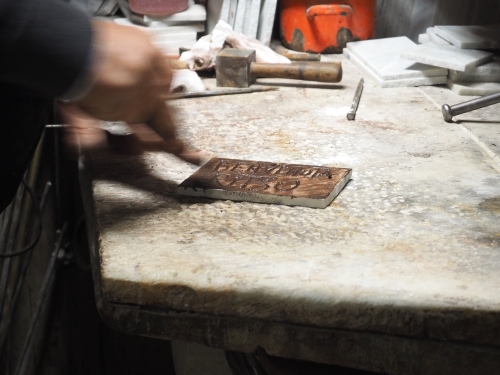
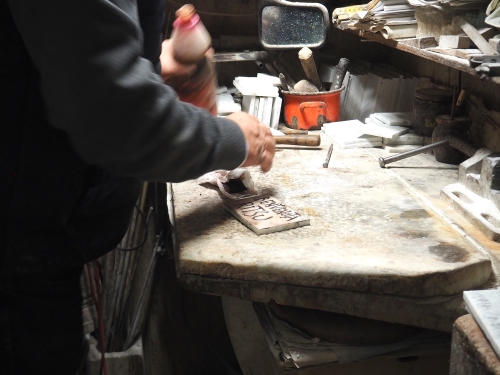
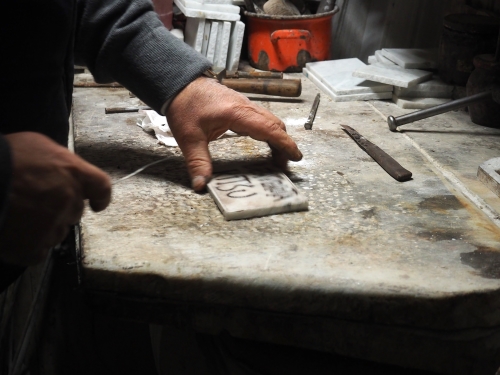
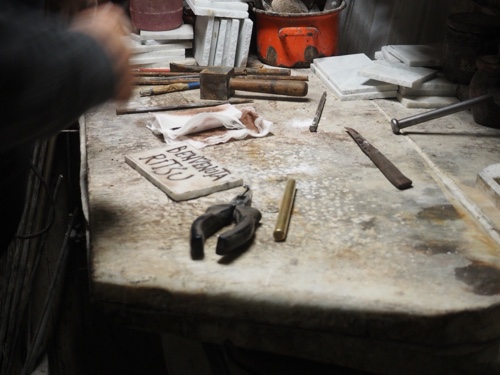
行程① 下書きの文字をプレートに彫る
大理石プレートを作業台に固定し、少しも躊躇することなく 道具でそのまま大理石へと文字を彫り出していきます。結構な強い力で打ち出しています。
![②](https://blog.storiaunica.com/wp-content/uploads/2016/03/6ac2397867767a902ce2217f0a58282f.jpg)
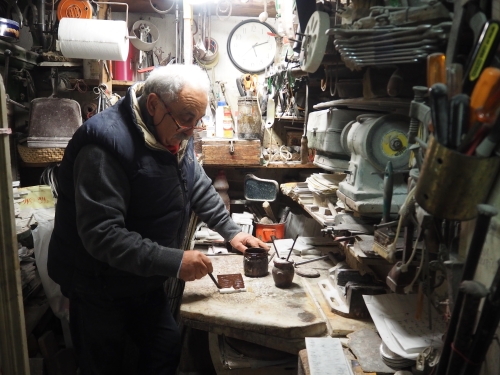
行程② チョコレート色の塗料を全体に塗る
![](https://blog.storiaunica.com/wp-content/uploads/2019/03/fd1149d11a7b8978ec53ad7c99de407e.jpg)
大理石に文字を彫り終えた後は、今度は茶色の塗料を筆でプレート全体に塗っていきます。大理石プレートは、まるで〝板チョコ〟のよう・・・
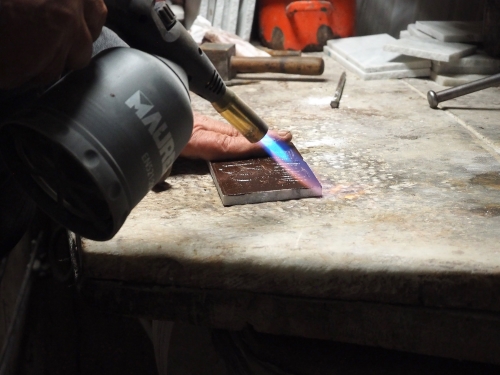
![3](https://blog.storiaunica.com/wp-content/uploads/2016/03/041c8e89b678b46731ac2144bc87c2e7.jpg)
行程③ ガスバーナーで炙る
![](https://blog.storiaunica.com/wp-content/uploads/2019/02/865d52766c08590dec36122957681171.jpg)
チョコレート色の塗料を塗り終えた後は、ガスバーナーでダイレクトに プレートを熱していきます。なかなか迫力満点の作業風景です!
![④](https://blog.storiaunica.com/wp-content/uploads/2016/03/ed80de20dfec1bd144442f3c2532b6bb.jpg)
![](https://blog.storiaunica.com/wp-content/uploads/2019/01/Lilly-1.jpg)
バーナーを使うなんて想像できないね!
行程④ 側面の塗料の汚れを落とす
![](https://blog.storiaunica.com/wp-content/uploads/2019/02/29852abac1519c4d4c565928f52568e2.jpg)
塗料が薄くなるまで、バーナーで熱し続けます。熱し終えた後は、側面の汚れを道具で軽く削り落としていきます。
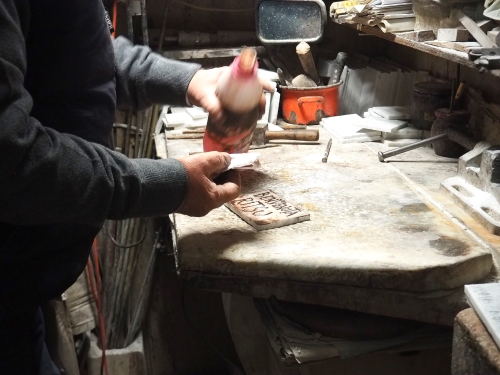
行程⑤ 洗浄液で塗料を拭き取る
![](https://blog.storiaunica.com/wp-content/uploads/2019/03/dc43575c8ee7adba20f3a7a459818356.jpg)
布に洗浄液を含ませ、表面に残るチョコレート色の塗料を丁寧に拭き取っていきます。
![⑦](https://blog.storiaunica.com/wp-content/uploads/2016/03/b54091b9ea851f9c8810b52e50cbc14b.jpg)
![](https://blog.storiaunica.com/wp-content/uploads/2019/02/29852abac1519c4d4c565928f52568e2.jpg)
“]彫ってある文字の部分には、炙ったチョコレート色の塗料が文字色として定着。
![](https://blog.storiaunica.com/wp-content/uploads/2019/01/Hal-1.jpg)
なるほど!
黒っぽく見えるプレートの文字色は、実は〝焦げ茶色〟だったんだね。
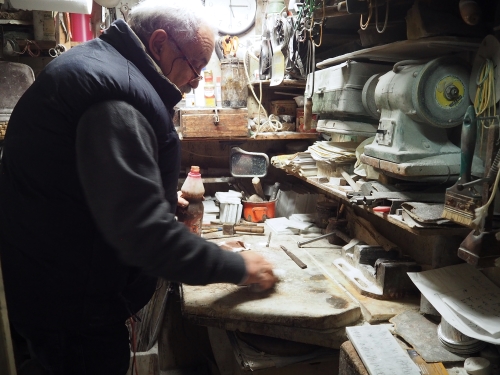
行程⑥ 道具を使って側面を整える
![](https://blog.storiaunica.com/wp-content/uploads/2019/02/29852abac1519c4d4c565928f52568e2.jpg)
表面の塗料がきれいに拭き取れたら、プレートの側面をやすりのような道具で整えていきます。
行程⑦ 金具の取り付け
![](https://blog.storiaunica.com/wp-content/uploads/2019/02/29852abac1519c4d4c565928f52568e2.jpg)
]側面が整ったら、金具を付けるための穴を開けます。穴が開いたら、金具となる針金を通していきます。
![⑪](https://blog.storiaunica.com/wp-content/uploads/2016/03/d1a6415d647990fc6dce6a19a3f775d3.jpg)
![](https://blog.storiaunica.com/wp-content/uploads/2019/03/dc43575c8ee7adba20f3a7a459818356.jpg)
]下の写真に写っている金色のペンのような道具を使用し、針金の先端をねじって丸くします。[
![YDE8nnQEPbMpmeEU.jpg](https://blog.storiaunica.com/wp-content/uploads/2016/02/YDE8nnQEPbMpmeEU.jpg)
![2d4p7AyC58k7LA4G.jpg](https://blog.storiaunica.com/wp-content/uploads/2016/02/2d4p7AyC58k7LA4G.jpg)
行程⑧ 仕上げ/完成
![](https://blog.storiaunica.com/wp-content/uploads/2019/02/526a19cce04925e94469b8df104b5849.jpg)
金具部分が仕上がったら、オリジナル大理石プレートの完成です。
![s4yaAWQl7Fjw3kmb.jpg](https://blog.storiaunica.com/wp-content/uploads/2016/02/s4yaAWQl7Fjw3kmb.jpg)
![](https://blog.storiaunica.com/wp-content/uploads/2019/01/Lilly-1.jpg)
工房に行ってみたくなるね。
![](https://blog.storiaunica.com/wp-content/uploads/2019/02/865d52766c08590dec36122957681171.jpg)
そうでしょ?
ローマ街歩きの際は、イタリアならではの本場の職人工房で職人さんたちの手仕事に触れてみて、正真正銘の〝MADE in ITLY〟のハンドメイドの世界をぜひ験してみて下さいね!